web analytics
Boys Haircuts at Home: Step-by-Step Guide for Parents (2026) | Boys and Girls Hairstyles
๐Ÿ’ˆ Kids & Family ยท DIY Guide

Boys Haircuts at Home:
Step-by-Step Guide for Parents

RL
RaDona Ludlow, Licensed Cosmetologist
Ages 3โ€“16
All skill levels
Clipper & scissor guide

A boys' haircut at home sounds intimidating until you understand that it's really three distinct skills: clipper work on the sides and back, scissor work on top, and blending between the two. Each one is learnable. Parents who master even the basics save $600โ€“$900 a year in barbershop visits โ€” and once the technique clicks, the whole cut takes under 20 minutes. This guide covers every step: the tools you actually need, the clipper guard system, the full technique, and exactly what to say when you do visit the barber.

RaDona Ludlow cutting a young man's short faded hairstyle in her Utah salon โ€” the same technique parents can learn at home with clippers and scissors
RaDona's salon technique โ€” the same method covered in this guide
#2 guard on the sides ยท scissor blend ยท clean neckline
Boys haircut being cut in the salon โ€” showing the finished short clean result that parents can achieve at home with the right technique
Boys Haircut & Style โ€” Salon Result
Achievable at home with the right tools
Annual savings
$600+
vs barbershop visits ยท $25โ€“35 per cut ยท every 4 weeks

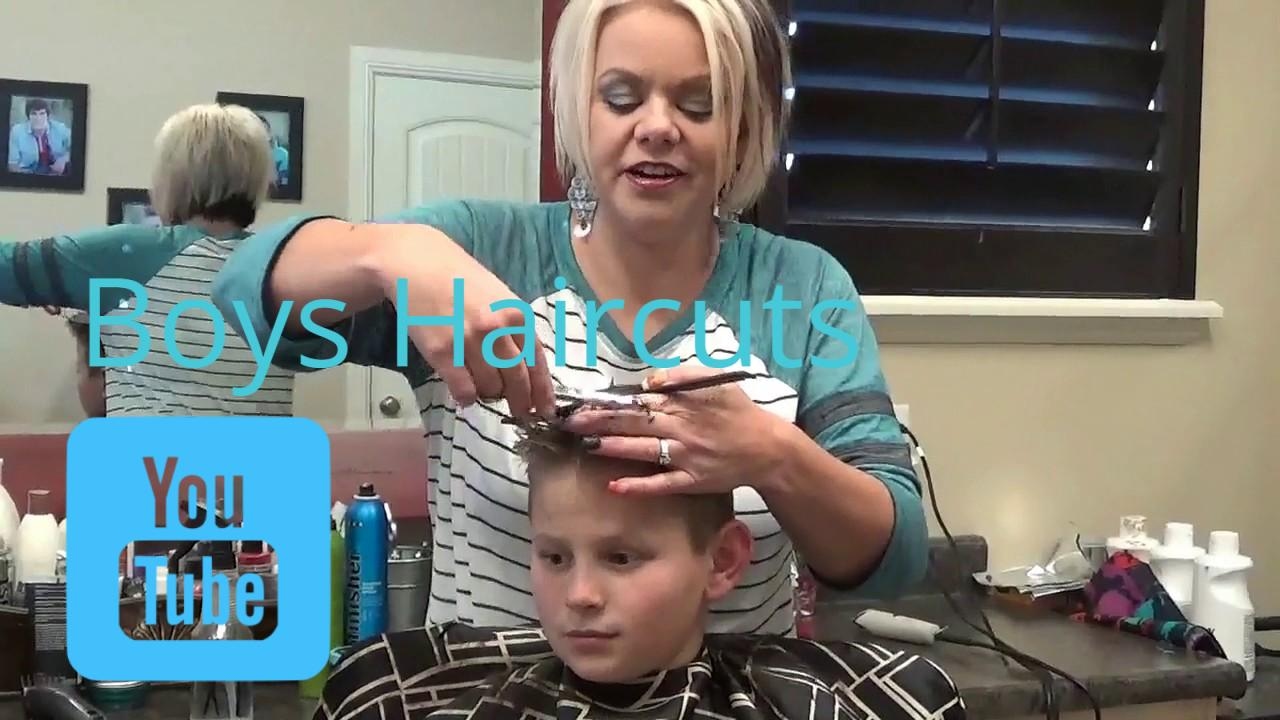
Watch: RaDona's Boys & Men's Haircut Tutorials

Both videos show the exact clipper and scissor technique this guide is built around โ€” the first on a young man (short faded style), the second specifically on a boy. Watch before your first attempt at home.

PRIMARY Short Faded Men's Cut โ€” Full Technique
RaDona cuts a short faded style on a young man โ€” #2 clipper on the sides, scissor-over-comb blending, clean neckline. The complete technique for the cut covered in this guide. Full guide: Mens Haircut Tutorial page.
BOYS CUT Boys Haircut & Style โ€” Salon Tutorial
The same clipper and scissor technique applied specifically to a boy's haircut โ€” clipper use, blending, and styling from start to finish. Watch both before your first home attempt.
๐Ÿ’ฐ
The maths: why home cuts pay for themselves in month one
Average US boys' haircut: $25โ€“35 ยท Frequency: every 4โ€“5 weeks ยท Annual cost: $280โ€“$455 per boy. A quality home clipper set costs $40โ€“$80 and lasts 5+ years. Month one: break even. Month two onwards: pure saving. Two boys in the house? The numbers double.
Shop Clippers โ†’

The Complete Tool Checklist

You don't need everything on this list for your first haircut. The bold items are non-negotiable. Everything else can be added as your confidence grows.

โšก
Cordless Clippers + Full Guard Set ESSENTIAL
The foundation of every home boys' haircut. Cordless = freedom of movement around the head. Full guard set (0โ€“8) covers every length combination. Look for: quiet motor (less intimidating for kids), light body, 60-min+ battery. This is the one item worth spending properly on.
๐Ÿ› Shop Clippers on Amazon โ†’
โœ‚๏ธ
Professional Barber Scissors (6") ESSENTIAL
For the top section and scissor-over-comb blending. Do not use kitchen scissors โ€” they push and bend hair rather than cut it cleanly. One quality 6" barber scissor lasts years. The blending step that makes a home haircut look professional is impossible with dull or wrong scissors.
๐Ÿ› Shop Scissors on Amazon โ†’
๐Ÿ”
Small Trimmer / Detailer STRONGLY RECOMMENDED
Used for the neckline and around the ears โ€” precision work the larger clipper can't do cleanly. A finished neckline is the single thing that makes a home cut look professional vs. unfinished. Most clipper sets include a trimmer; if not, buy one separately.
๐Ÿ› Shop Trimmers on Amazon โ†’
๐Ÿชฎ
Fine-Tooth Barber Comb STRONGLY RECOMMENDED
For scissor-over-comb blending โ€” comb sections upward, cut what extends above. The 7"+ barber comb with both fine and wide teeth is the professional standard. Fine teeth for cutting, wider teeth for detangling before the cut.
๐Ÿ› Shop Combs on Amazon โ†’
๐Ÿฆธ
Haircut Cape STRONGLY RECOMMENDED
Keeps hair off clothing and makes the cleanup 10x faster. Kids are also significantly more cooperative when they're wearing a cape โ€” it signals "this is a real haircut" and makes them feel part of the experience. Adjustable neck closure, nylon or polyester.
๐Ÿ› Shop Capes on Amazon โ†’
๐Ÿ’ฆ
Spray Bottle + Clipper Oil
Spray bottle keeps hair damp for scissor work (damp hair cuts more evenly). Clipper oil applied to the blades before every use extends the life of your clippers dramatically and ensures a clean cut rather than a pull. Both cost under $5.
๐Ÿ› Shop Accessories on Amazon โ†’
๐Ÿชž
Hand Mirror
For checking the back of the cut before removing the cape. The back is the section most likely to be uneven and the one the child can't check. A hand mirror + bathroom mirror combination lets you see every angle before you call it done.
๐Ÿ› Shop on Amazon โ†’
๐Ÿงน
Neck Duster Brush
Removes cut hair from the neck and face at the end. Important for kids who'll be distracted by prickly hair on the neck as soon as the cape comes off. A soft-bristle neck brush is the professional finishing tool that signals the haircut is complete.
๐Ÿ› Shop on Amazon โ†’

Clipper Guard Reference โ€” Know Before You Cut

Every clipper guard number equals 1/8" of hair length. Memorise this and every clipper haircut guide in the world becomes legible. The guard controls how much hair the clipper leaves after a pass.

#0
Blade
Near-skin. Neckline clean-up only. Too dramatic for most boys' sides.
#1
1/8"
Very short sides. Used in low section of skin or high fade. Shows scalp.
#2
1/4" โ† START HERE
The most common boys' sides guard. Short, clean, neat without being extreme. RaDona's go-to for first home cuts.
#3
3/8"
Blend guard. The transition between #2 sides and longer top. Critical for the fade effect.
#4
1/2"
Medium short. Good for conservative sides or all-over shorter styles.
#6
3/4"
Medium. Used on top for clipper-only cuts or as the longer end of a taper.
#8
1"
Longer clipper length. All-over buzz or top of a longer clipper-only cut.
โœ‚๏ธ
Scissors
Top section cut with scissors. More length control than any clipper guard.

Fade vs. Taper โ€” What's the Difference?

๐Ÿ“‰
The Taper

Hair gradually gets shorter toward the neckline and sideburns โ€” but never goes to skin or very close. A taper is a gradual reduction in length. The hair at the neckline is shorter than the hair at the top, but there's no dramatic jump between the two.

  • โœ“Easier to cut at home โ€” more forgiving
  • โœ“Grows out more naturally
  • โœ“Conservative โ€” works in any school/setting
  • โœ“Best starting point for home cutting
Start here for home cuts
โšก
The Fade

Hair blends from very short (often near-skin) at the bottom to longer at the top โ€” with a defined transition zone. A fade is a high-contrast blend. The bottom is dramatically shorter than the top, creating the sharp contrast that defines the modern barbershop look.

  • โ†’Low fade: starts above the ear
  • โ†’Mid fade: starts at the temple
  • โ†’High fade: starts near the crown
  • โ†’Requires more technique to get right
Barbershop or once comfortable at home

Step-by-Step: Boys' Haircut at Home

This guide cuts the standard boys' short taper โ€” short on sides and back, longer on top, cleanly blended. Master this and the fade variations become straightforward next steps.

โš ๏ธ
Before you pick up the clippers โ€” one rule
Always start longer than you think. Begin with a guard one size longer than your target and take more off in a second pass if needed. You cannot put hair back. Every experienced barber starts conservatively and removes more โ€” never the opposite.
  1. 1
    Prep โ€” wash, damp-dry, cape up
    Wash and towel-dry the hair to damp โ€” not soaking wet, not fully dry. Damp hair lies flat and even, shows the true length, and cuts cleanly. Drape the cape and adjust the neck closure so it's snug but not tight. Oil the clipper blades once before starting. Have a distraction ready (tablet, favourite show) โ€” younger boys will sit significantly stiller when occupied.
  2. 2
    Clip the sides โ€” #2 guard, upward passes
    Attach the #2 guard. Starting at the nape on one side, move the clippers upward against the direction of hair growth in smooth, consistent passes. Work from the neckline up to where the sides naturally curve toward the top of the head โ€” this is your stopping point. Work around both sides and the full back. Use the comb to lift sections as you go for consistency. Move steadily โ€” hesitant passes create lines.
  3. 3
    Create the blend โ€” #3 guard, flicking motion
    Switch to the #3 guard. In the transition zone โ€” where the #2 section ends and the longer top begins โ€” work the clipper with an outward flicking motion rather than a full pass. Angle the clippers away from the head as you reach the top of the clipped section, flicking the end of the guard out so the tips barely graze the hair. This gradual blend is the taper. Work slowly around the entire head. Watch the primary tutorial video above โ€” this motion is significantly clearer to see than to read.
  4. 4
    Scissor blend the transition line
    After clipper blending, there's usually a remaining faint line at the transition point. Comb small sections upward with the fine-tooth comb and point-cut across the transition zone with scissors โ€” cutting the tips that extend above the comb teeth. This scissor-over-comb step removes the last line and produces the polished blend. This is the step that most separates a home cut from a barbershop result. Take your time here.
  5. 5
    Cut the top โ€” comb-and-scissors method
    Dampen the top with the spray bottle. Section front to back. Lift each section with the comb, hold firmly between two fingers, cut across โ€” whatever extends above your fingers is removed. Move systematically from the front section to the back, keeping the amount lifted consistent. For a textured finish, angle the scissors at 45ยฐ (point-cut) rather than cutting straight across. This removes the blunt edge that makes boys' cuts look stiff rather than natural.
  6. 6
    Clean the neckline with the trimmer
    Remove all guards. Using the small trimmer (or the clipper blade-only), carefully clean the neckline. Follow the natural hairline growth โ€” natural necklines curve or have a slight point. Do not draw a forced straight horizontal line higher up the neck; it looks artificial and grows out badly. Clean around both ears and along the sideburns. This step makes the entire cut look intentionally finished.
  7. 7
    Check the back, dry and adjust
    Use the hand mirror to check the back before removing the cape. Both sides should be even โ€” the back is the section most likely to be slightly off and the one neither of you can see in the mirror during the cut. Blow-dry and check the true finished shape dry. Make any final scissor adjustments. Dust with the neck brush, remove the cape, check one final time. Done.

Boys' Haircut by Face Shape

Face shapeBest styleKey detailAvoid
OvalAny โ€” most versatileNatural proportions flatter most cuts; experiment freelyNothing strictly off-limits
RoundTaper or mid-fade with volume on topHeight at crown elongates; close sides reduce widthClose all-over buzz โ€” maximises roundness
Square / wide jawLow taper; textured top; soft not sharp sidesTextured, slightly messy top softens angular featuresSkin fade with hard shaved lines โ€” draws attention to jaw
Long / oblongMedium length sides; avoid extra crown heightLeave more width at the sides; shorter crown height balancesHigh fade + tall quiff โ€” adds length to a long face
Heart (wide forehead)Mid taper with textured fringeTextured fringe reduces visual forehead widthSlicked-back no-fringe styles โ€” fully expose wide forehead
Boys haircut finished result from RaDona's salon โ€” clean short sides, textured top, neat neckline
The Finished Result โ€” Boys Haircut from the Salon
Clean sides, textured top, neat neckline. Achievable at home within 3โ€“4 practice cuts.
Dutch braid technique reference โ€” the same under-crossing motion used in scissor-over-comb blending for boys' haircuts
Dutch Braid Reference โ€” Section Control Technique
The same consistent-section-and-tension principle from braid technique applies directly to scissor-over-comb blending. Watch the Dutch Braid Tutorial for section control practice.

The Real Challenge: Keeping Boys Still

Technique is learnable in an afternoon. This part takes longer.

  • Screen time is your best tool: A tablet propped at eye level showing a favourite show or game is the single most effective stillness strategy. Reserve it specifically for haircuts so it retains its value.
  • Short sessions beat marathon attempts: For very young or wiggly boys, split the cut into two sessions โ€” sides and back today, top and neckline tomorrow. Quality of result beats completion speed every time.
  • Let him hold something small: A toy or snack in each hand gives fidgety energy somewhere to go that isn't the head.
  • Work fast on the sections they dislike: Most boys are fine with clipper work but dislike the scissor-on-top section (the comb lifting feels odd). Know this and work efficiently through it.
  • Same time, same place, same routine: Predictability dramatically reduces resistance. A standing Saturday morning appointment in the same chair with the same show becomes non-negotiable rather than a negotiation.
  • Praise the result, not the sitting: Show him in the mirror and make a genuine fuss about how good it looks. Boys who feel the haircut payoff cooperate better next time.

Common Mistakes โ€” and the Fix

โŒ Starting too short
Start one guard longer than your target. Always. You can remove more on a second pass โ€” you cannot put it back. This applies to every haircut you will ever cut at home.
โŒ Skipping the scissor blend
Clipper blending alone leaves a visible line at the transition. Step 4 (scissor-over-comb) removes it. This is the step most beginners skip because it feels advanced โ€” it's not. Watch the video, practise the motion. It's 2 minutes of work that produces 90% of the "professional" appearance.
โŒ A fake straight neckline
Natural necklines are never perfectly horizontal. Follow the natural growth pattern with the trimmer โ€” don't impose a straight line. A forced straight neckline grows out badly and immediately identifies a home cut vs. a professional one.
โŒ Checking the result wet
Hair looks different wet and dry. Always dry and re-check before removing the cape. Corrections in the chair take 2 minutes โ€” corrections after the kid has stood up and the hair has scattered everywhere require the full setup again.

When to Go to the Barber โ€” and What to Tell Them

Home cuts work brilliantly for maintenance between barbershop visits. For the first cut establishing a new style, or for complex fade work, a professional is the right call. Here's exactly what to say when you get there:

Phrases that get exactly what you want
  • "#2 on the sides and back, fade to #4 through the transition
  • "Low/mid fade โ€” [point to the temple or above ear]
  • "Scissors on top, leave [X] inches, textured not blunt
  • "Follow the natural neckline โ€” no straight line across
  • +Bring a photo from this page or the tutorial videos
Go to the barber when...
  • โœ“Establishing a new style from scratch
  • โœ“He wants a skin fade or high-contrast fade
  • โœ“School photo week, special event
  • โœ“You've had an "incident" and need a rescue
  • โœ“He wants complex line work or a hard part

Home Cut Maintenance Schedule

StyleFull cut frequencyNeckline touch-upHome vs barbershop
Short taper (#2 sides)Every 4โ€“5 weeksEvery 2โ€“3 weeks100% home once technique is comfortable
Low/mid fadeEvery 3โ€“4 weeksEvery 2 weeksFade at barber, maintenance at home
High/skin fadeEvery 2โ€“3 weeksWeeklyBarber โ€” requires advanced technique
Longer scissor cutEvery 6โ€“8 weeksAs needed100% home โ€” most forgiving for beginners
Buzz cut (all one guard)Every 3โ€“4 weeksEvery 2 weeks100% home โ€” easiest possible cut
๐Ÿ›๏ธ
Shop the Complete Home Haircut Kit
Clippers, scissors, capes, trimmers, combs and clipper oil โ€” everything on the checklist above, all available in RaDona's Amazon storefront. Most families cover the full kit for under $80, and recoup that cost within the first month.
Browse Amazon Store โ†’
๐Ÿ“ฉ
Home Haircut Guides โ€” Free to Your Inbox
Boys' and men's haircut guides, technique videos, tool picks and money-saving tips โ€” from RaDona's Utah salon, delivered free.
Join the Email List โ†’
๐Ÿ’ˆ
Full Men's Haircut Tutorial
The complete step-by-step men's haircut guide โ€” same technique, fully expanded with clipper guard reference and professional tips.
Mens Haircut Tutorial โ†’

Leave a Reply

Your email address will not be published. Required fields are marked *

Fill out this field
Fill out this field
Please enter a valid email address.
You need to agree with the terms to proceed

5 × three =