3 techniques coveredAll hair lengthsBeginner to expert
Wavy hair is the most requested styling look in RaDona's Utah salon — and also the most misunderstood. Women come in saying they've tried for years and can never get it right. The problem is almost never technique. It's product order, section size, and which tool is actually right for their hair. This tutorial covers all three wave techniques — beach waves with a curling wand, flat-iron waves, and overnight heatless waves — with exact steps, the right products in the right order, and the fixes for every common problem.
Natural Waves — The Goal
Definition, bounce, movement. Achievable on almost any hair type.
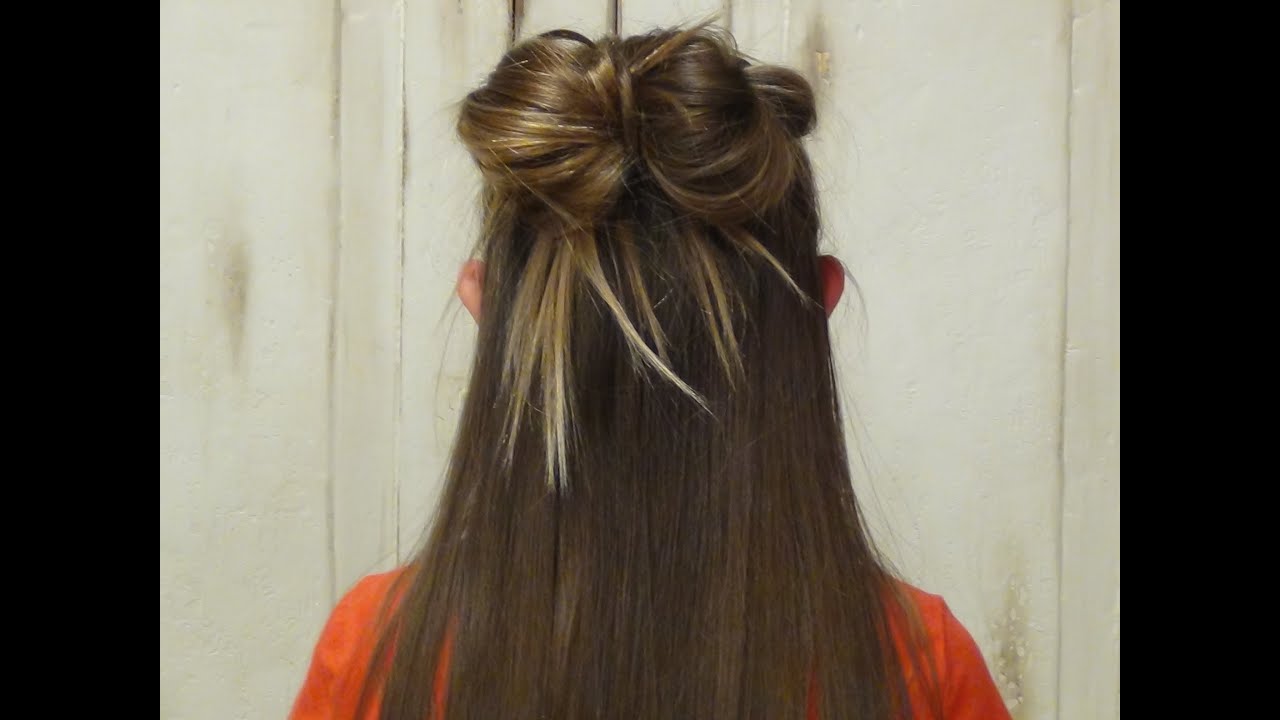
Waves → Updo
3 minutes, no extra tools
Waves → Braid
Texture makes braids hold better
3
distinct techniques covered
15min
beach waves start to finish
0°
heat needed for heatless technique
48hr
waves last with the right products
Watch: RaDona's Wavy Hair Tutorials
Three videos from the channel — the wavy and curly hair technique tutorial, the messy bun (which uses waves as its foundation), and the French braid guide (because textured, wavy hair braids more beautifully than any other). Watch the primary video first — the hand motion for the wand technique is significantly clearer to see than to read.
PRIMARY
Wavy & Curly Hair Tutorial
The main tutorial for this page — RaDona works with natural wavy and curly hair, showing how the right products and technique unlock the texture that's already there.
APPLICATION
Messy Bun — Waves as Foundation
Create beach waves first, then twist into the bun — the waves give it the volume and texture a flat-hair bun never achieves. Full guide at the Messy Bun Tutorial.
COMPANION
French Braid — Elevate Your Waves
Wavy hair braids with more grip, more texture, and more visual richness than straight hair. A braid started in day-two beach waves is one of the most beautiful styles there is.
The most common reason waves fail has nothing to do with the tool or the technique. It's product application — applying in the wrong order, or using the wrong type for the hair texture. Get this right first and every technique below becomes easier.
💧
Step 1
Heat Protectant
On damp or dry hair BEFORE any heat tool. Non-negotiable. Applied to every section.
🫧
Step 2
Mousse or Texturizer
On damp hair before blow-drying. Gives the wave something to hold its shape around.
🌊
Step 3
Create the Wave
The tool technique (wand, flat iron, or heatless). Dry, cool, release in order.
🤲
Step 4
Break Apart — Fingers Only
Run fingers through once to separate. Never a brush — it destroys wave definition.
✨
Step 5
Hold Spray + Oil
Light hold spray from 14" away. 2 drops finishing oil through ends for shine without frizz.
🌊 RaDona's Rule
Waves need grip to hold shape — which means completely clean, freshly-washed hair is actually the hardest starting point. Day-two hair (with natural oil build-up, or a small amount of dry shampoo worked through) gives the wave something to grip. If you're styling freshly washed hair, apply a texturizing spray through dry hair before sectioning. It recreates the grip day-two hair already has.
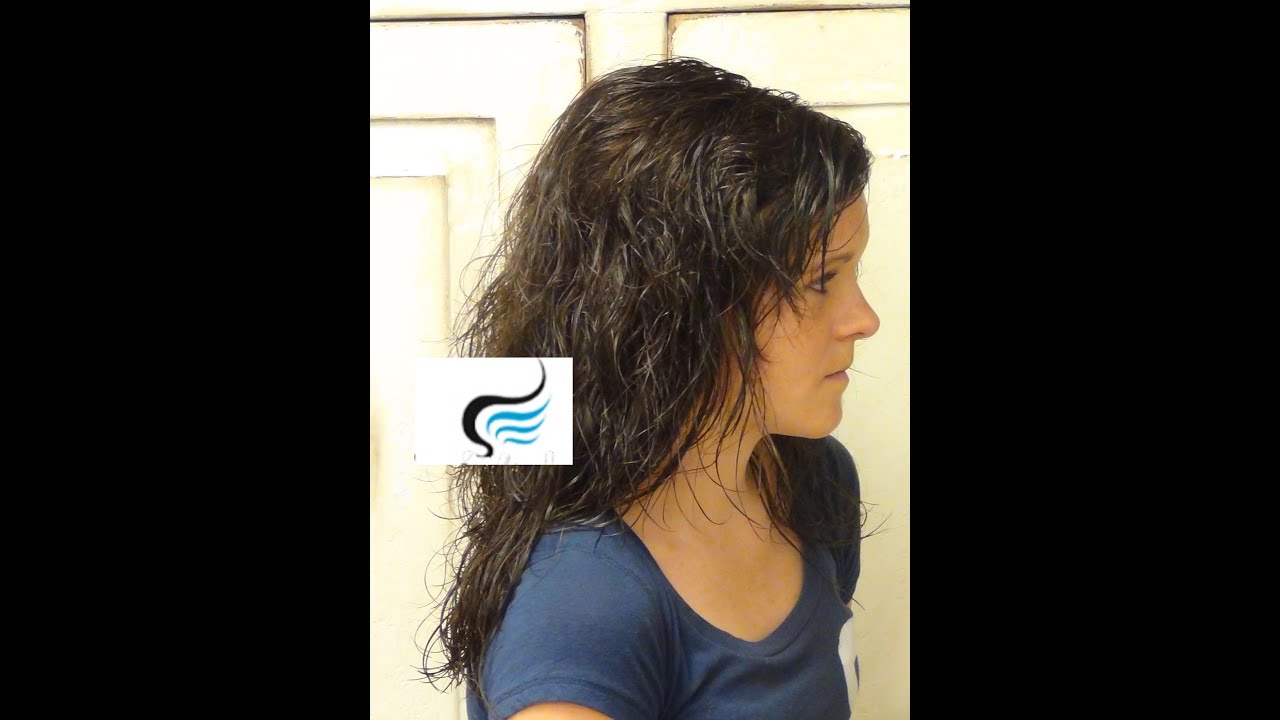
Technique 1 — Beach Waves with a Curling Wand
The most popular wave technique and the one that creates the most natural-looking result. A curling wand (barrel without a clamp) wraps hair freely, producing the irregular, non-uniform wave pattern that looks like you've been at the beach — rather than the uniform ringlets a clamp-style iron creates.
1
Prep — heat protect and section
Dry hair · 5–8 sections · wand 1"–1.5" barrel
Apply heat protectant through dry hair. Clip the top half up and work from the bottom. Each section should be no wider than the wand barrel — thinner sections create tighter, longer-lasting waves; thicker sections create loose, relaxed waves.
2
Wrap away from the face — always
Direction makes or breaks the look
Hold the wand vertically. Take a section, wrap it around the barrel moving away from your face — this creates an open, natural wave that frames the face. Wrapping toward the face makes waves that close inward, hiding rather than framing. Hold 8–12 seconds on fine hair, 12–15 on thick hair.
3
Release into your palm — let it cool completely
This step is where most people lose the wave
When you release the section from the wand, catch it gently in your palm and hold it coiled there until it cools completely — 15 to 20 seconds. Releasing a hot wave and letting it fall immediately loses up to 60% of the set. The wave needs to cool in its coiled position to hold the shape.
4
Alternate direction on alternating sections
The key to natural, not uniform waves
Every second section, flip the wand and wrap in the opposite direction. When you break apart with fingers, alternating directions creates the non-uniform pattern that looks natural rather than styled. Same-direction waves look like a formal curl. Alternating waves look like the beach.
5
Break apart with fingers, not a brush
Final separation — the most important step for the look
Once all sections are complete and fully cool, flip your head forward and run your fingers through from root to tip — just once, loosely. This separates the individual waves into the flowing, tousled look. Finish with a light-hold spray from 14 inches away, then two drops of finishing oil pressed through the ends.
Waves → Bun in 3 Minutes
Beach waves as the foundation for everything else
Beach Wave Quick Specs
Barrel size1" – 1.5"
Heat (fine hair)300–350°F
Heat (thick hair)350–400°F
Hold time per curl8–15 seconds
Total time12–20 minutes
Hair lengthShoulder+
Technique 2 — Flat Iron Waves
The flat iron is what most people already own, which makes this the most accessible technique. Done correctly it produces a slightly more polished, elongated wave — closer to a Hollywood wave than a beachy texture. It works particularly well on medium-length hair where a wand might be awkward.
The S-wave technique
1
Section hair as for the wand — smaller sections than you think. Wider than 1.5" won't heat evenly.
2
Clamp the flat iron at the root. Rotate the iron 180° away from the face so the hair wraps around the plates.
3
Slowly glide down — maintaining the rotation. The key is slow: fast movement = no wave. Allow 3–4 seconds per inch of length.
4
At the midpoint, reverse the rotation direction — this creates the S-bend that looks like a natural wave rather than a curl.
5
Release onto your palm, hold until cool, then move to the next section. Same break-and-spray finish as the wand method.
💡 Flat Iron vs Wand — Choose Based On This
Use the wand for: beachy, tousled, undone waves on longer hair. Use the flat iron for: polished Hollywood waves on medium-length hair, more controlled texture, and if the wand feels awkward to handle. Neither is better — they produce different results.
Flat Iron Quick Specs
Plate width1" (most versatile)
Heat (fine)300–330°F
Heat (thick)350–380°F
Speed per sectionSlow — 3–4 sec/inch
Total time10–18 minutes
Best lengthBob to mid-back
Technique 3 — Overnight Heatless Waves
The technique that requires the most patience and zero heat — and produces the softest, most lived-in wave result of all three methods. Set damp hair the night before, wake up with waves already done. Particularly valuable for fine or heat-damaged hair, or for anyone who styles every day and wants to give their hair a break from tools.
🌊
Method A — Braids
Divide damp hair into 4–6 sections and braid each loosely. Sleep on it. Unravel in the morning, break apart with fingers. Tighter braids = tighter waves. The more sections, the more waves. Works on all lengths from collarbone down.
🌀
Method B — Twist Buns
Part damp hair down the centre. Twist each half tightly, coil into a bun, secure with a soft scrunchie (not elastic — it leaves a crease). Sleep. Unravel and separate. Creates a beautiful boho wave with minimal effort.
🎀
Method C — Silk Scarf
Wrap damp hair around a silk or satin scarf that's been tied to sit across the top of the head. Wind sections around it alternately, pin ends. Sleep. Remove in the morning for soft, touchable waves. Best for medium-length hair.
🌙 Heatless Tip
Damp — not wet. Soaking wet hair set into braids or buns overnight takes too long to dry and risks the wave breaking before the hair sets. Towel-dry to 70% and apply a small amount of curl cream or styling foam before setting. The product gives the wave grip and the slight dampness allows the hair to hold the shape as it dries fully overnight.
Wavy Hair Braids Better Than Straight Hair
Natural texture gives braids three things straight hair can't provide: grip (the wave locks sections together), body (the braid appears fuller than the hair actually is), and visual dimension (the wave pattern catches light through the braid). Day-two beach waves are the single best foundation for a braid of any kind.
Volumising mousse before styling, light-hold spray after
Medium, normal texture
Wand for beachy; flat iron for polished
1"–1.25" wand
330–360°F
Sea salt spray or texturizing spray before; medium-hold spray after
Thick or coarse
Wand with larger barrel; flat iron S-wave
1.25"–1.5" wand
370–400°F — thick hair needs heat
Curl cream before; strong-hold spray after
Naturally wavy
Enhance existing wave — scrunch with diffuser
Diffuser attachment only
Low heat; some air-dry
Curl-defining cream + light mousse; no brushing
Heat-damaged or fragile
Heatless only — overnight braid or twist bun
No heat tools
No heat
Leave-in conditioner before setting; curl cream on damp hair
Short (bob to chin)
Flat iron S-wave or small wand
3/4"–1" barrel
330–360°F
Sea salt spray gives texture that short waves need to read as waves
Troubleshooting — Why Your Waves Aren't Working
❌ Waves fall out within an hour
Two causes: you're not letting each curl cool before releasing (the most common), or your hair has heavy conditioning product that's weighting the wave down. Let curls cool completely in your palm. Skip the conditioner on the mid-lengths and ends on wash days when you plan to wave.
❌ Waves look like ringlets, not waves
You're holding the wand too long (over-curling) or using a barrel that's too small. Switch to a 1.25" or 1.5" barrel and reduce hold time by 3–4 seconds. Also: you need to break the curls apart with fingers after finishing. Un-separated curls look like ringlets — separated ones look like waves.
❌ One side waves, the other doesn't
Almost always a dominant-hand issue — you're wrapping with more consistent tension on one side. Consciously slow down on the non-dominant side and take thinner sections. Alternatively, use the same hand position for both sides by reaching over rather than switching grip.
❌ Frizzy rather than wavy
Frizz means the hair is lacking moisture or being touched too much while still warm. Apply a small amount of curl-defining cream to damp hair before heat styling. After waving, do not touch until everything is completely cool. Finish with 2 drops of finishing oil pressed (not rubbed) through the ends.
❌ Waves only show at the bottom
You're only waving from mid-length downward. Start the wand or flat iron as close to the root as you safely can — typically 1" from the scalp. Root-to-end waving creates a shape that reads as waves from every angle, not just the tips.
❌ Waves look flat by midday
You need a stronger finishing product. Switch from flexible-hold to medium-hold spray. Or add a quick scrunch of sea salt spray to the mid-lengths after the wave cools — the salt crystals grip the wave and prevent it from dropping under its own weight through the day.
Heat protectants, wands, flat irons, sea salt spray, curl creams and finishing oils — every product she uses in her Utah salon, organised by hair type.