Watch: RaDona Cuts a Little Girl's Bob in the Salon
This is the video this page was built for — RaDona working with young Alex in her Utah salon, cutting the A-line bob step by step. Watch the full transformation before booking an appointment or attempting the cut at home.
The A-Line Bob in RaDona's Salon — Real Client Photos
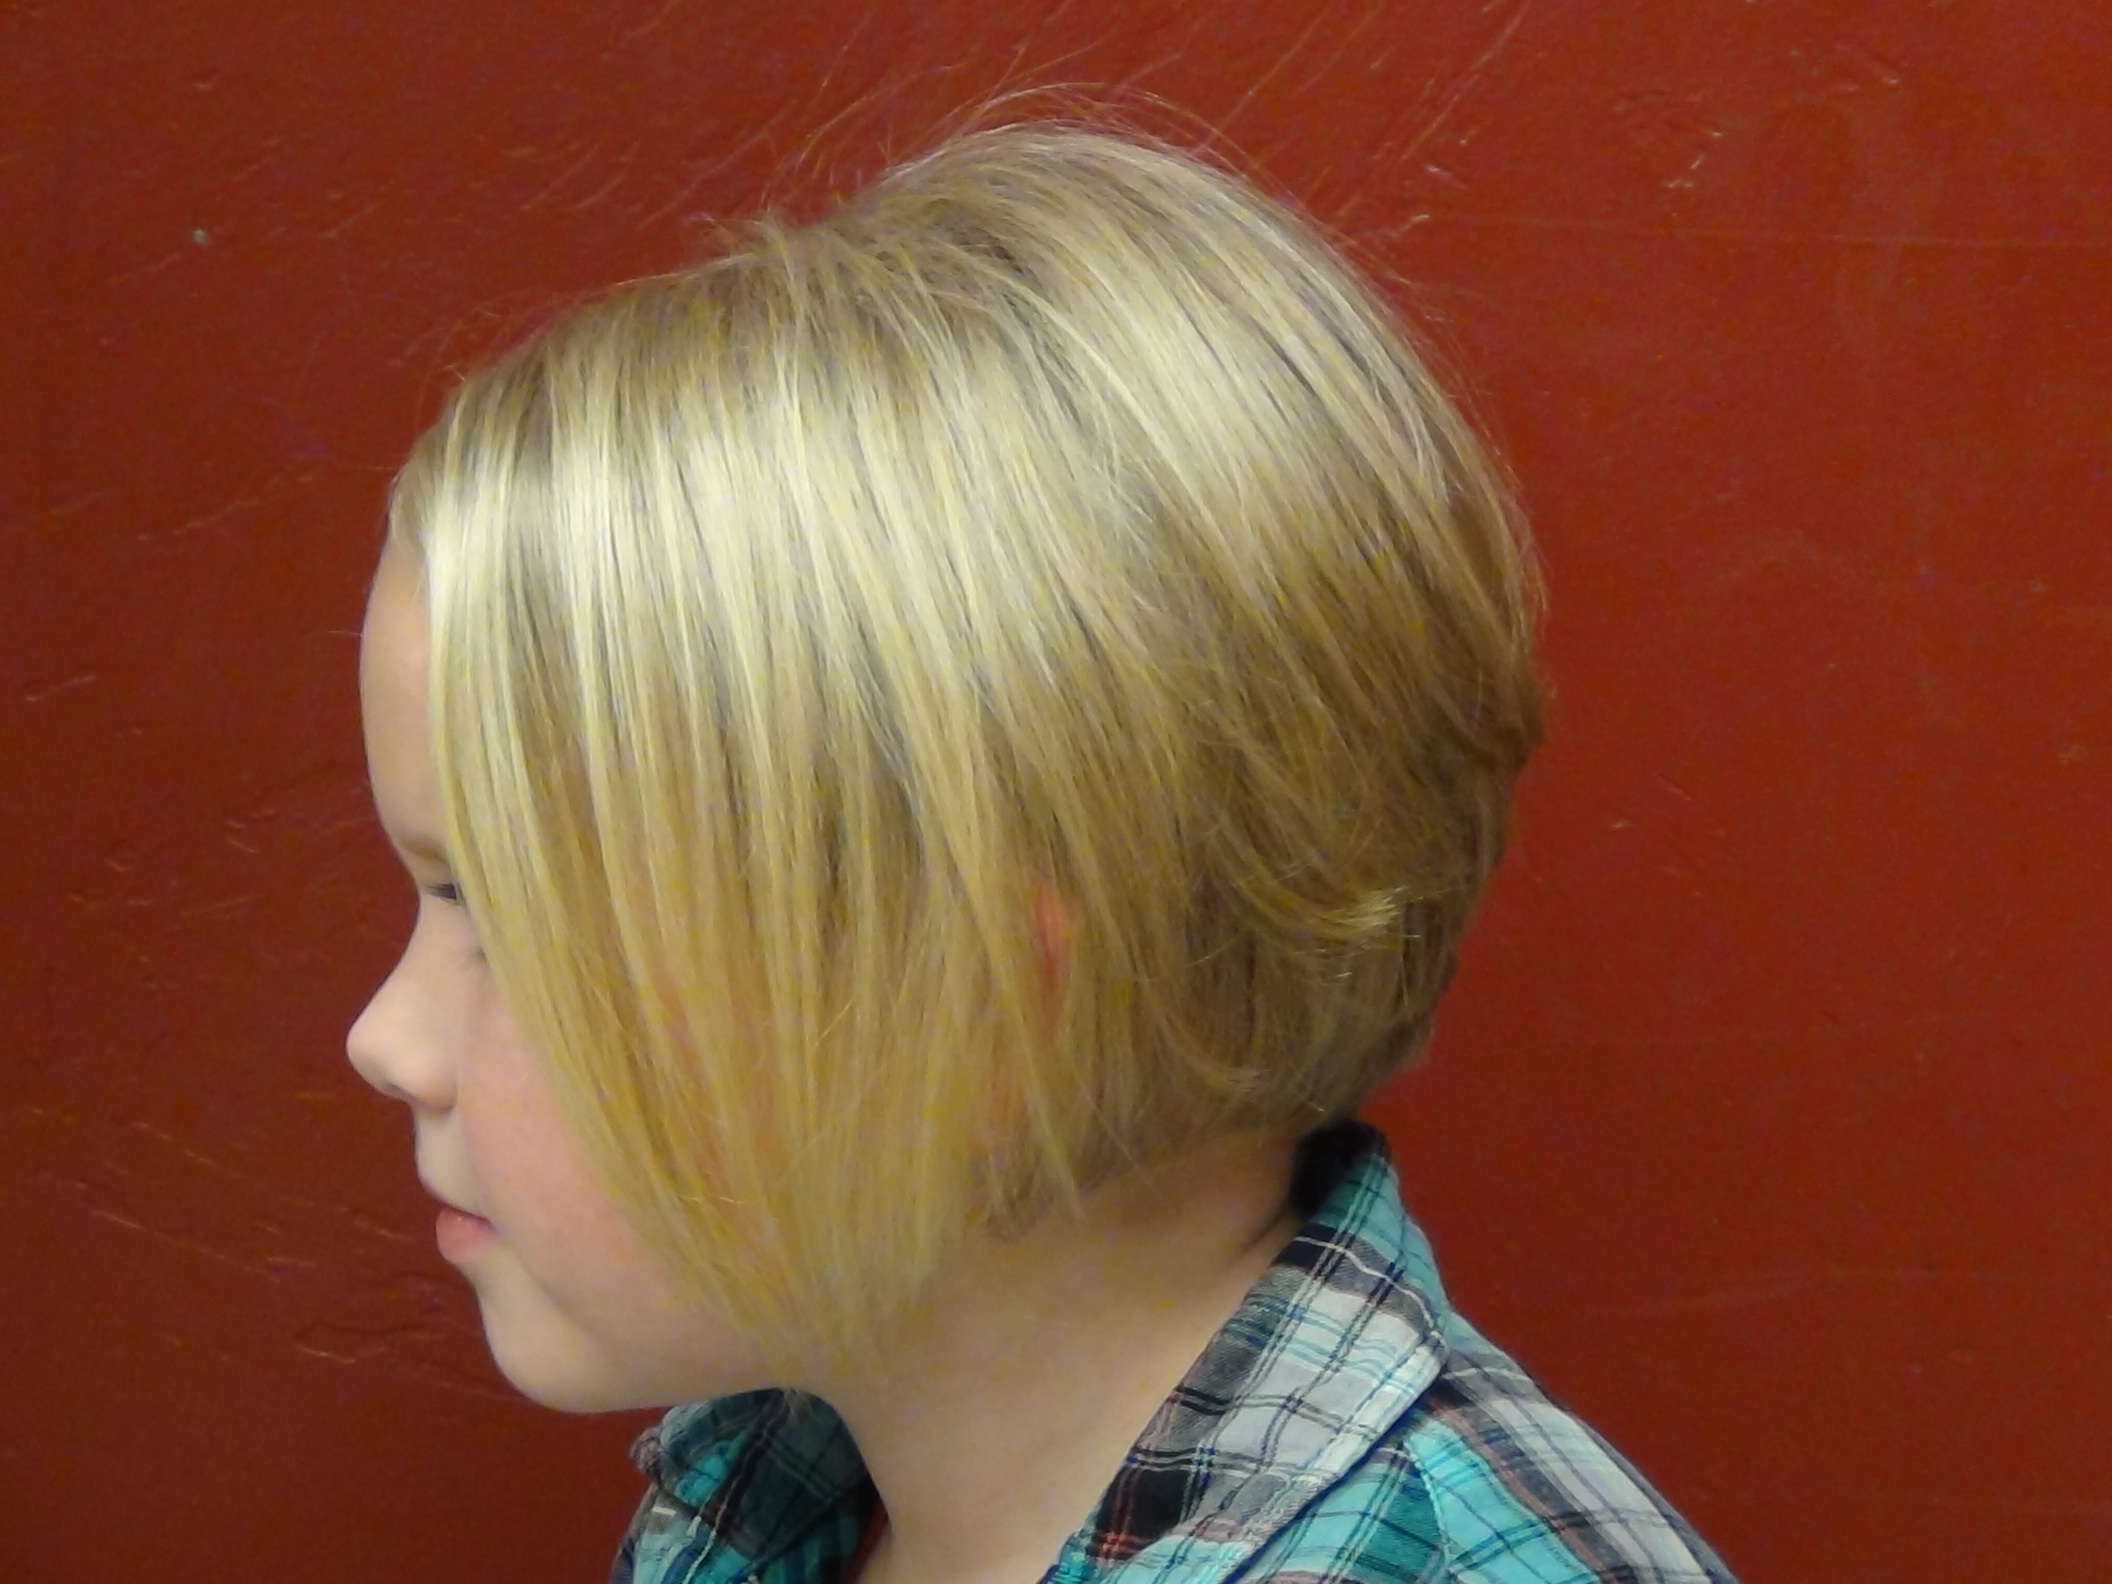
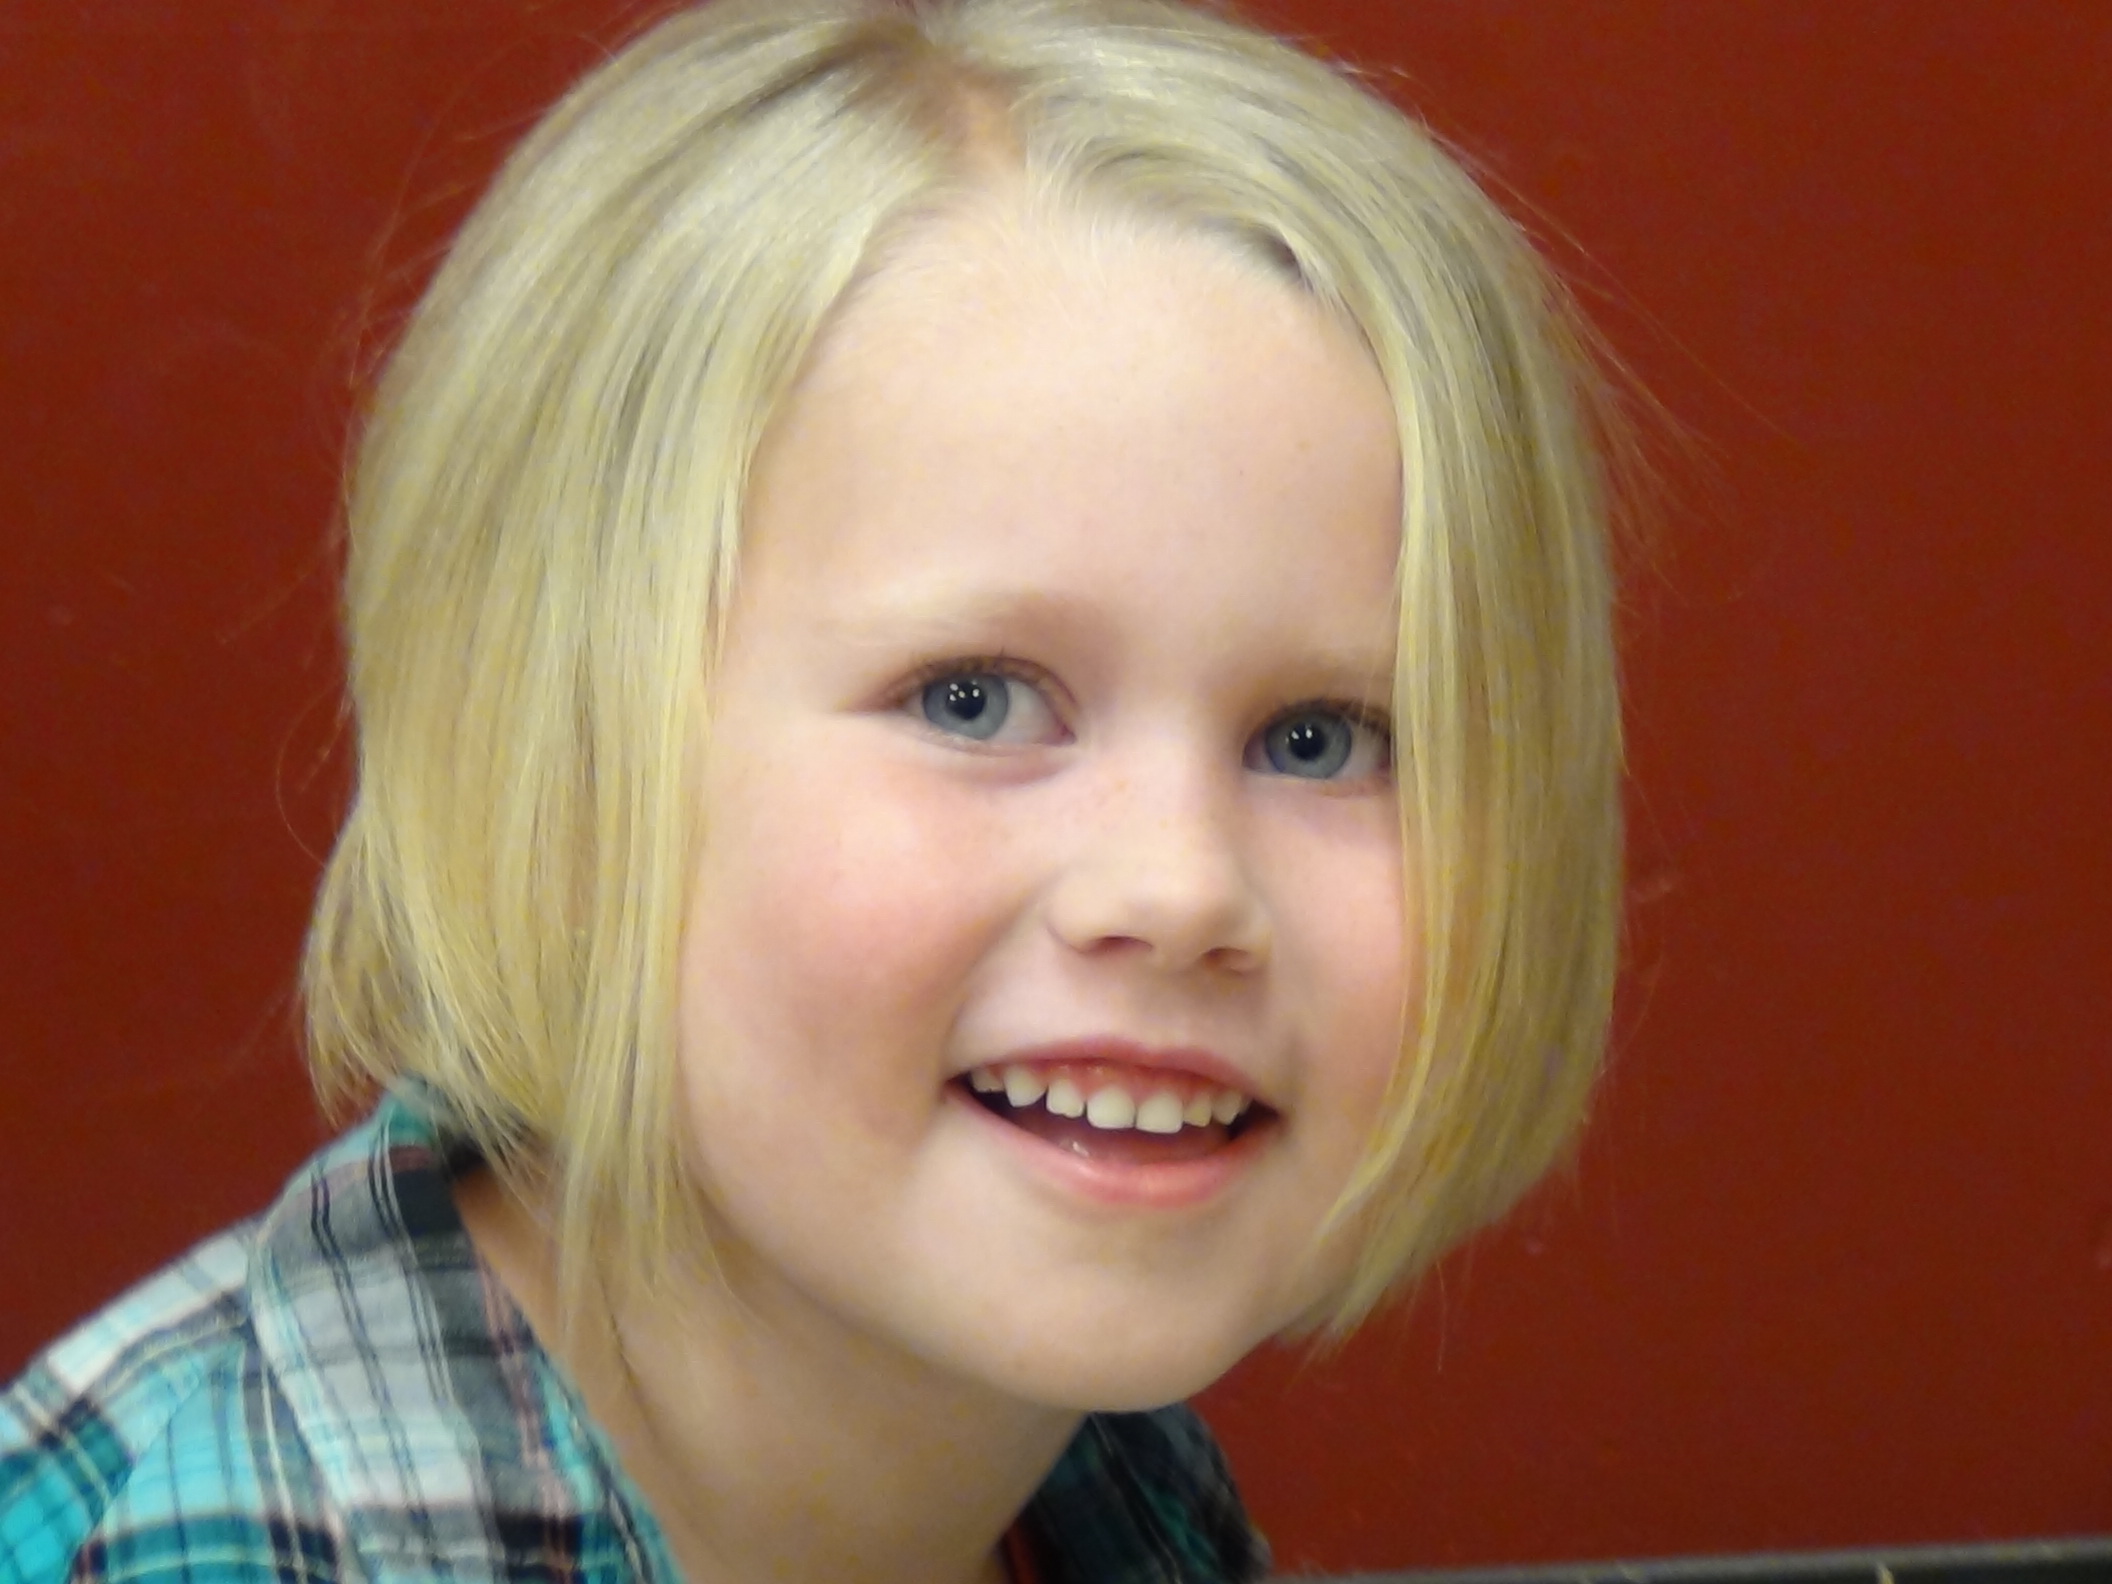
These are photos from an actual A-line bob appointment in RaDona's Utah salon. The client was a young girl whose mum wanted to remove the thin, stringy baby-hair ends and create the appearance of thicker, healthier hair. The A-line bob accomplished exactly that.
Why the A-Line Bob Works So Well for Little Girls
Most of the reasons parents bring young girls in for a first short cut come down to the same thing: the hair looks thin and stringy, the ends are damaged from baby-hair growth, or it's simply become too hard to manage. The A-line bob addresses all three at once.
Bob Haircut Variations for Little Girls
The "bob" covers a wide range of cuts. Here's how each variation differs and which hair types and ages suit each one best.
- 1A-Line Bob (RaDona's Signature for Little Girls)Shorter at the back, gradually longer toward the front and jaw — the defining diagonal line creates the "A" shape. The back is often stacked (layered to add volume and roundness), while the front pieces frame the face. This is the most popular version for young girls because the stacked back creates the illusion of much denser hair, and the face-framing front flatters virtually every face shape. Works on straight, wavy, and slightly curly hair.
- 2Classic Blunt BobAll one length — no layering, no graduation, no angle. Cut straight across the bottom at chin length or slightly above. The blunt perimeter creates the maximum visual thickness at the ends, which is ideal for girls with very fine hair because the ends lying on top of each other look denser than layered ends. Works beautifully on straight hair; can look boxy on very thick or wavy hair without interior layers.
- 3Layered BobInterior layers throughout the bob create movement and reduce bulk — the best version for girls with naturally thick or wavy hair that needs weight removed. The layers create a lighter, bouncier result than the blunt bob, and they allow natural wave patterns to develop more freely. Not ideal for very fine hair, where layers can make ends look wispy rather than full.
- 4Bob with Fringe (Bangs)Any of the above bob styles with fringe cut across the forehead — either blunt straight-across, or softly parted. Bangs on a bob are a classic combination for young girls: they frame the face completely, keep hair out of the eyes without clips, and give the whole look a tidy, intentional feel. The trade-off: bangs need trimming every 4–6 weeks as they grow into the eyes faster than the rest of the bob.
- 5Lob (Long Bob)A bob that sits at collarbone length rather than chin — a good compromise for girls who want shorter hair but aren't ready for the full bob commitment. The lob still benefits from all the structural advantages of the bob (removed baby-hair ends, better density appearance) while allowing more versatility in braids and ponytails. Works on all hair types; grows out gracefully without an awkward mid-stage.
Choosing the Right Bob by Face Shape
| Face shape | Best bob variation | Key effect | What to avoid |
|---|---|---|---|
| Oval | Any bob — A-line most recommended | Natural proportion; all cuts flatter | Nothing strictly to avoid |
| Round | A-line with longer front pieces; avoid blunt fringe | Longer front pieces elongate the face visually | Chin-length blunt bob with full fringe — maximises roundness |
| Heart (wide forehead) | Classic bob with soft side-swept fringe | Side fringe softens the wider forehead; length at jaw adds visual width at the lower face | Very short bob that emphasises the narrow jaw |
| Square (strong jaw) | Layered bob with soft fringe; lob | Layers and softness around the jaw reduce the angular look | Blunt bob at jaw length — draws attention directly to the jaw angle |
| Long / oblong | Blunt chin-length bob with fringe | Horizontal fringe and chin length create width, breaking the vertical line of a long face | A-line with long front pieces — accentuates the length |
How the A-Line Bob Is Cut — What RaDona Does in the Salon
Understanding the technique helps you communicate with a stylist and know whether the cut is being done correctly. These are the steps RaDona follows for the A-line bob shown in the video above.
- 1Section and establish the nape guideRaDona starts at the back — establishing the shortest point of the cut at the nape of the neck. This guide length determines the length of the entire back section. For little girls with thin hair, this is often cut shorter than the parent initially expects, because the shorter length is what creates the thickness effect.
- 2Stack the back using internal graduationThe back of the A-line bob is graduated — meaning the underneath layers are cut shorter than the top layers, which fall over them to create a stacked, rounded fullness at the back of the head. This is the technique that gives the cut its volume and its rounded nape shape. For girls with very fine hair, more graduation creates more apparent volume.
- 3Create the diagonal line from back to frontWorking around the head from the back to the sides, RaDona follows the diagonal guide — each section gets progressively longer as she moves toward the face. The front pieces at the jaw are the longest point of the entire cut. The consistency of this diagonal line is what makes the A-line recognisable.
- 4Point-cut the perimeter for a soft finishRather than a blunt straight cut across the perimeter, RaDona uses point cutting (angling the scissors into the hair at 45°) to soften the edge. This removes the harsh line that can make a bob look stiff, and creates a more natural, slightly textured finish that moves better and grows out more gracefully.
- 5Style to check the fall and symmetryBlow-dry the cut into its natural fall and check both sides for symmetry. Minor adjustments are made dry — this is normal and expected. A bob that looks even wet but uneven dry needs correction before the client leaves the chair. The video above shows this complete process.
5 Ways to Style a Little Girl's Bob
One of the strongest arguments for the bob is how many ways it can be worn. Here are five styles — from the fastest school-morning option to the most dressed-up special-occasion look.
A small French braid along one side of the hairline, swept across the front and pinned behind the opposite ear. The braid sits like a headband made of hair — no accessory needed. Even on a short bob, there's enough hair at the front hairline to create a French braid from temple to temple. Pin behind the ear and you've transformed the everyday bob into something that photographs beautifully and holds all day without clips falling out.
What to Tell the Stylist
The most common source of disappointment after a child's haircut is miscommunication at the salon. These are the exact phrases RaDona recommends parents use to get the A-line bob right:
- "A-line bob with a stacked back" — this tells the stylist to graduate the back for volume and create the diagonal length line from back to front. These are specific technical terms every qualified stylist will understand immediately.
- "Point-cut the perimeter, not blunt" — requests a soft, textured finish rather than a harsh straight edge across the bottom. Point cutting makes the bob look more natural and grow out more gracefully.
- "Keep the front pieces at jaw length" — establishes the longest point of the cut. This is the most important measurement of the A-line bob — everything else is proportional to it.
- "Take the back shorter than you might think — I want it to look thicker" — this gives the stylist permission to cut the nape close, which is where most of the density illusion comes from. Many stylists default to safe lengths without this prompt.
- Bring a photo — the photos on this page from RaDona's salon are a perfect reference. A photo from the front and the back covers both angles the stylist needs to see.
Maintaining a Little Girl's Bob Between Salon Visits
| Task | How often | Why it matters |
|---|---|---|
| Full salon trim | Every 6–8 weeks | The bob loses its shape quickly — especially the stacked back. The diagonal line becomes gradual and the nape grows out. A 6-week trim keeps the style looking intentional. |
| Fringe/bang trim (if applicable) | Every 4–6 weeks | Fringe grows into the eyes faster than the rest of the cut. It can be trimmed at home between salon visits — RaDona has a guide for this. |
| Blow-dry at home | After every wash | The bob's shape is best seen when the hair is dried correctly — air drying alone can create an uneven, frizzy look. A round brush + 3 minutes of heat is all that's needed. |
| Trim split ends at home | Every 3–4 weeks if needed | Point-cutting the very ends at home between salon visits can extend the life of the style. Only cut off a tiny amount and only at the perimeter. |