Dutch Braid Tutorial: How to Dutch Braid Your Hair Step by Step
Dutch Braid Tutorial: How to Dutch Braid Your Hair Step by Step for Beginners and Children
Creating a Dutch braid can be a fun and stylish way to manage hair, especially for beginners and children. This tutorial will guide you through the process step by step, ensuring that you can master this beautiful hairstyle with ease. A Dutch braid, often referred to as an “inside-out braid,” is characterized by its raised appearance, which sets it apart from the traditional French braid. Many people struggle with braiding techniques, but with the right instructions and practice, anyone can learn how to create a stunning Dutch braid. In this article, we will cover the essential tools needed, step-by-step instructions, tips for successful braiding, and common mistakes to avoid.
Step-by-Step Guide to Dutch Braiding Hair for Beginners and Children
To begin your journey into Dutch braiding, it’s essential to understand the basic techniques and tools required. This guide will provide clear instructions tailored for beginners, making it easy for both adults and children to follow along. The focus will be on creating a Dutch braid that is not only beautiful but also practical for everyday wear.
What is a Dutch Braid?
A Dutch braid is a three-strand braid that is created by weaving the strands under each other, rather than over, which gives it a distinctive raised appearance. This technique creates a more pronounced and textured look compared to a French braid. The Dutch braid is versatile and can be styled in various ways, making it a popular choice for both casual and formal occasions.
Essential Tools Needed:
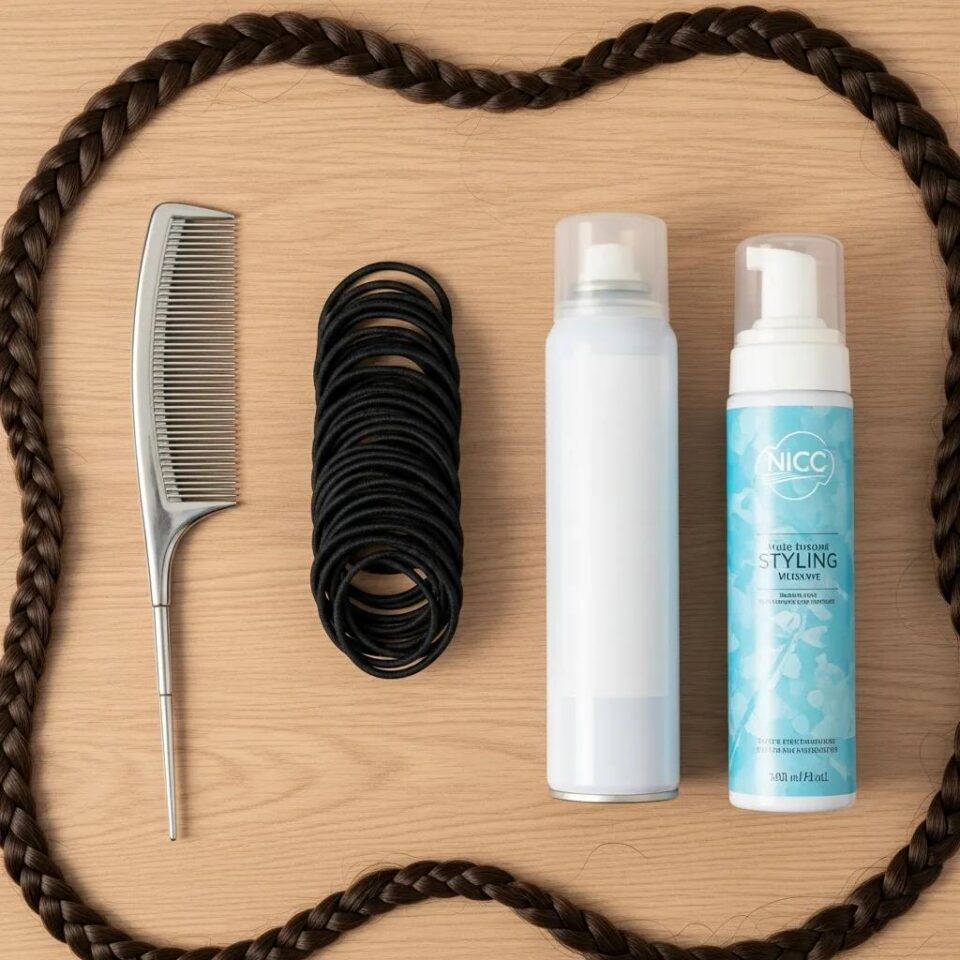
Before you start braiding, gather the following tools to ensure a smooth process:
Having the right tools will make the braiding process easier and more enjoyable.
Step-by-Step Instructions:
Follow these steps to create a beautiful Dutch braid:
- Prepare Your Hair: Start with clean, dry hair. Brush through to remove any tangles.
- Section the Hair: Divide the hair into three equal sections at the top of the head.
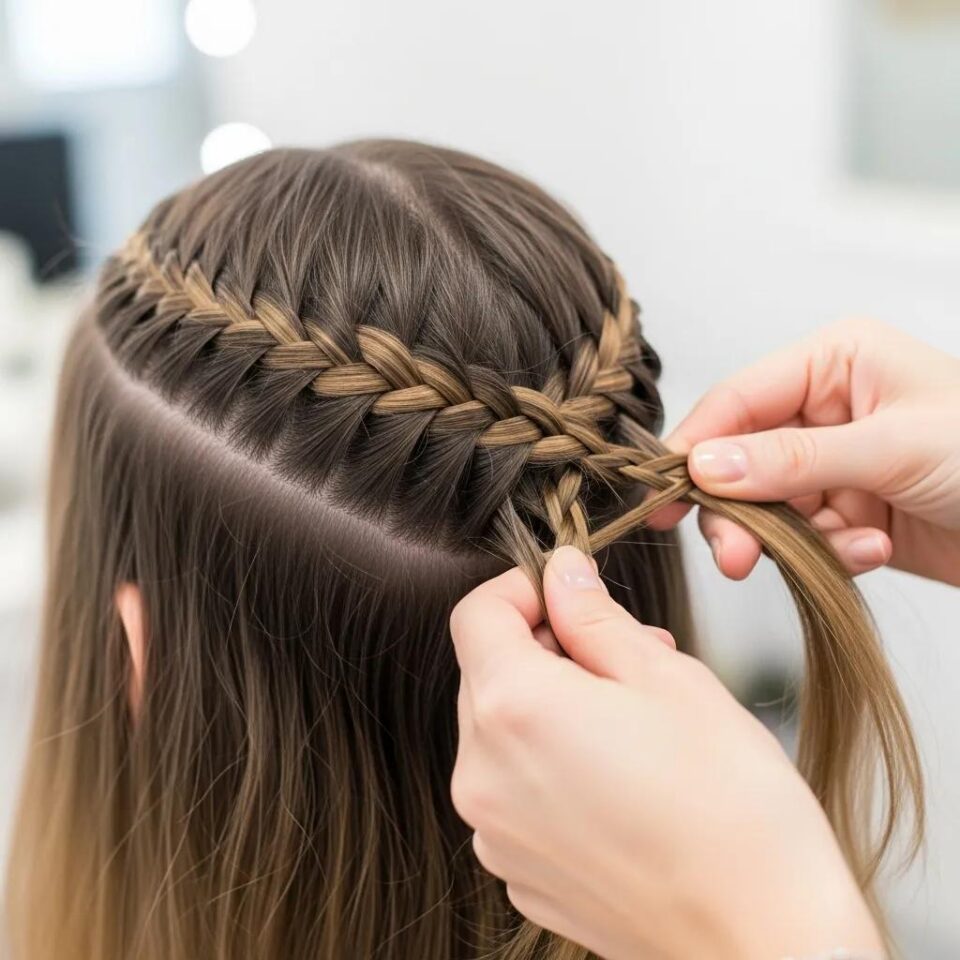
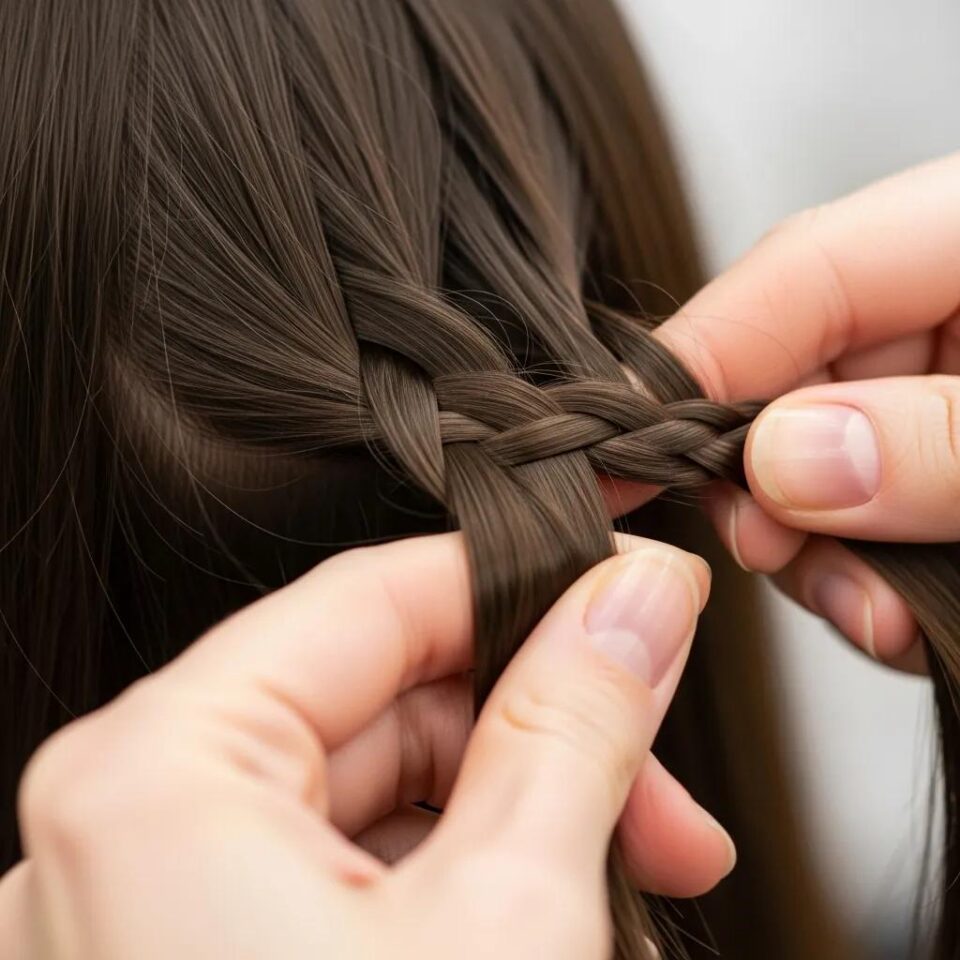
- Begin Braiding: Cross the right section under the middle section, then the left section under the new middle section.
- Add Hair: As you continue braiding, add small sections of hair from the sides to each strand before crossing under.
- Continue Until Complete: Repeat this process until you reach the nape of the neck, then secure the braid with a hair tie.
For those looking to enhance their braiding skills, Boys and Girls Hairstyles offers a variety of hair care products that can help manage texture and hold, making the braiding process smoother.
Tips for Successful Braiding:
To ensure your Dutch braid turns out beautifully, consider the following tips:
- Practice Even Tension: Maintain consistent tension on each strand to create a uniform braid.
- Use the Right Tools: A fine-tooth comb can help create clean sections, while good quality hair ties will keep your braid secure.
- Be Patient: Braiding takes practice, so don’t be discouraged if it doesn’t turn out perfectly the first time.
Common Mistakes to Avoid:
When learning to Dutch braid, it’s easy to make a few common mistakes. Here are some to watch out for:
- Uneven Tension: Pulling too tightly on one side can lead to an uneven braid.
- Incorrect Sectioning: Make sure to take equal sections of hair to maintain balance.
- Skipping Steps: Follow each step carefully to avoid confusion and ensure a neat braid.
How Does a Dutch Braid Differ from a French Braid?
The primary difference between a Dutch braid and a French braid lies in the technique used. In a French braid, the strands are woven over each other, creating a flatter appearance against the scalp. In contrast, the Dutch braid’s strands are woven under, resulting in a raised effect. This distinction not only affects the visual outcome but also the texture and volume of the braid.
What Tools and Products Do You Need for Dutch Braiding?
Reiterating the tools needed for Dutch braiding can help ensure you are well-prepared:
Having these tools on hand will make the braiding process much smoother.
What Are the Essential Steps to Create a Dutch Braid?
To summarize, the essential steps for creating a Dutch braid include:
- Preparation: Start with clean, dry hair.
- Sectioning: Divide hair into three equal parts.
- Braiding: Cross strands under each other while adding hair from the sides.
- Securing: Finish with a hair tie once you reach the desired length.
What Are Common Mistakes and How Can You Troubleshoot Dutch Braiding?
If you encounter issues while braiding, here are some troubleshooting tips:
- Identifying Mistakes: If your braid looks uneven, check your tension and section sizes.
- Correcting Uneven Tension: Adjust your grip on the strands to ensure even pulling.
- Improving Sectioning: Use a comb to create clean, equal sections for a neater braid.
How to Care for and Style Dutch Braids for Children and Women
Caring for Dutch braids is essential to maintain their appearance and health. Regularly check for tangles and use a gentle brush to avoid breakage. For children, consider adding fun accessories like colorful hair ties or clips to personalize their braids. Women can style Dutch braids in various ways, such as incorporating them into updos or leaving them loose for a casual look.
What Are the Best Hair Care Tips for Maintaining Dutch Braids?
To keep your Dutch braids looking their best, follow these hair care tips:
- Daily Care Routines: Gently brush the braids to prevent tangling.
- Recommended Products: Use leave-in conditioners or light oils to keep hair moisturized.
- Avoiding Damage: Be cautious when removing hair ties to prevent breakage.
What Are Easy and Age-Appropriate Styling Ideas for Children’s Dutch Braids?
For children, Dutch braids can be styled in fun and age-appropriate ways:
- Playful Accessories: Incorporate colorful ribbons or clips to make the braid more exciting.
- Half-Up Styles: Create a half-up Dutch braid for a cute and practical look.
- Double Braids: Consider making two Dutch braids for a playful, symmetrical style.
By following this tutorial, you can master the art of Dutch braiding, creating beautiful hairstyles for yourself and your children. With practice and the right tools, anyone can learn to create stunning Dutch braids that are both stylish and practical.