Learn How to French Braid Your Hair:
Step-by-Step for Beginners
If you want to learn how to French braid your hair, the easiest way to think about it is this: start like a regular three-strand braid, then add a small piece of loose hair each time you cross an outside section over the middle. That is the core motion, and once your hands understand it, most French braid styles begin to feel much more manageable.
This page is built for the real beginner question behind the search: not just what a French braid is, but how to actually do it without getting lost halfway through. Below you will find the braid pattern, the cleanest step-by-step sequence, the mistakes that make a braid look uneven, and the practice tips that help when you are braiding your own hair behind your head.
To French braid, gather a starting section, split it into three strands, do the first braid crosses, and then keep adding a little hair from each side before each new cross. Repeat that pattern to the nape, then finish as a regular braid.
Watch the Tutorial First
For a skill like this, video helps immediately. It lets you see the strand changes, how the hands reposition after each cross, and how much hair to add on each pickup. That is why a French braid video is often the difference between understanding the concept and actually being able to repeat it.
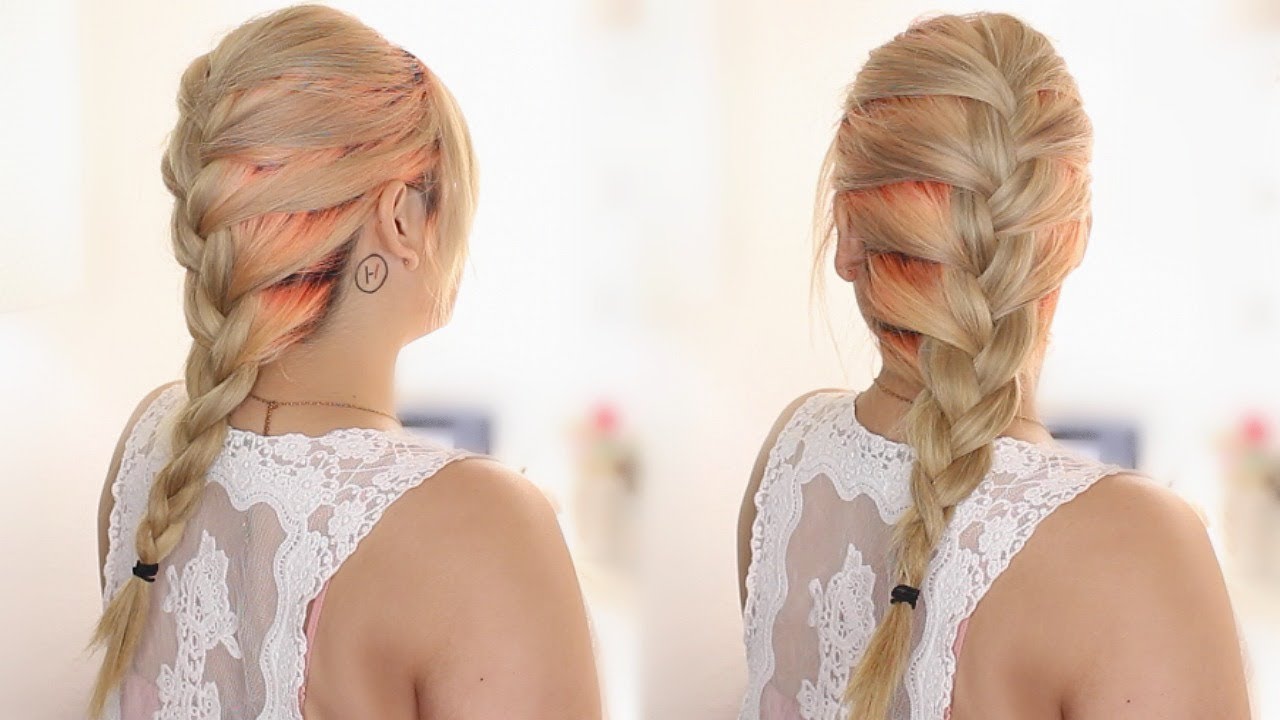
French Braid Basics for Beginners
A French braid is just a three-strand braid with an added step. Instead of crossing the outside strands over the middle on their own, you first add a thin piece of loose hair to the outside strand. Then you cross it over the center. That is the entire difference.
Do not try to make the braid perfect on your first pass. Learn the rhythm first, then improve neatness second. The sequence matters more than the polish in your first few tries.
How to French Braid Step by Step
- 1Brush and prepare the hairRemove tangles first. A smooth starting surface makes sectioning easier and helps the strands slide where they should without snagging.
- 2Take a section from the crownGather a section from the top center of the head where you want the braid to begin. Divide it into three even strands.
- 3Make the first braid crossesCross the right strand over the center, then the left over the new center, just like a regular braid. This gives you a base to work from.
- 4Add hair to the right sideBefore the right strand crosses again, pick up a small section of loose hair from the right side and combine it with that strand.
- 5Cross and repeat on the leftCross the combined right strand over the center. Then pick up a small section from the left side, add it to the left strand, and cross that over the center.
- 6Continue the same pattern down the headKeep alternating sides. Add hair, cross over the center, add hair, cross over the center. The motion stays the same all the way to the nape.
- 7Finish as a regular braidOnce all the loose hair has been gathered, continue with a normal three-strand braid to the ends and secure it with an elastic.
What You Need Before You Start
You do not need many tools for a good French braid. A simple setup usually works best.
- Brush or comb to remove tangles
- Tail comb if you want cleaner parting
- Small elastic to secure the end
- Light texturizing spray or mousse for slippery hair
- Bobby pins for flyaways or a looser front section
Common French Braid Mistakes and How to Fix Them
| Problem | What usually causes it | Best fix |
|---|---|---|
| Braid drifts to one side | Uneven pickups or a crooked starting section | Slow down at the top and make your first section more centered. |
| Braid looks bumpy | Adding large pieces on one side and tiny pieces on the other | Try to match the size of the added sections on both sides. |
| Braid gets loose too fast | Inconsistent tension and sections slipping between the fingers | Keep a steady rhythm and hold the strands close to the head as you cross. |
| Hands feel tangled | Trying to move too quickly before the strand order feels natural | Practice the three-strand motion first, then add pickups only after the hand pattern makes sense. |
If the braid starts to look messy in the first inch, restart early. Fixing the top almost always fixes the entire braid.
How to French Braid Your Own Hair More Easily
French braiding your own hair is harder because you cannot see the back clearly and your arms fatigue faster. The easiest improvement trick is to practice the movement on someone else or on one side of your head first. Once your fingers understand the cross-and-pickup pattern, the back of your own head becomes far less intimidating.
- Start with a centered part and smooth crown section
- Keep your elbows comfortable so your shoulders do not tighten
- Pause after every two or three crosses if needed
- Do one practice braid for speed and one for neatness
French Braids Should Be Secure, Not Painful
A French braid can be neat and long-lasting without being painfully tight. If the style hurts, causes scalp tension, or leaves tenderness after you take it out, it is too tight. Hair pulled back with repeated tension can contribute to breakage and traction-related hair loss, which is why secure styling should still feel comfortable.
How to French Braid Your Hair: A Step-by-Step Guide
How do you start a French braid?
Start with a section at the crown, split it into three strands, and make the first braid crosses. Then begin adding a small piece of loose hair to each outside strand before crossing it over the middle.
What is the difference between a French braid and a Dutch braid?
A French braid crosses over the center. A Dutch braid crosses under the center. That one change creates a flatter look for French braids and a raised ridge for Dutch braids.
How long does it take to learn?
Most beginners start to understand the pattern in one or two practice sessions. Clean results usually come after a few more tries, especially when braiding your own hair.
What helps beginners the most?
Watching the motion once on video, starting with smaller pickups, and practicing slowly on a single braid usually helps the fastest.
Get More Easy Hairstyle Tutorials
Join the email list for braid tutorials, everyday styles, and favorite product picks from Boys & Girls Hairstyles.